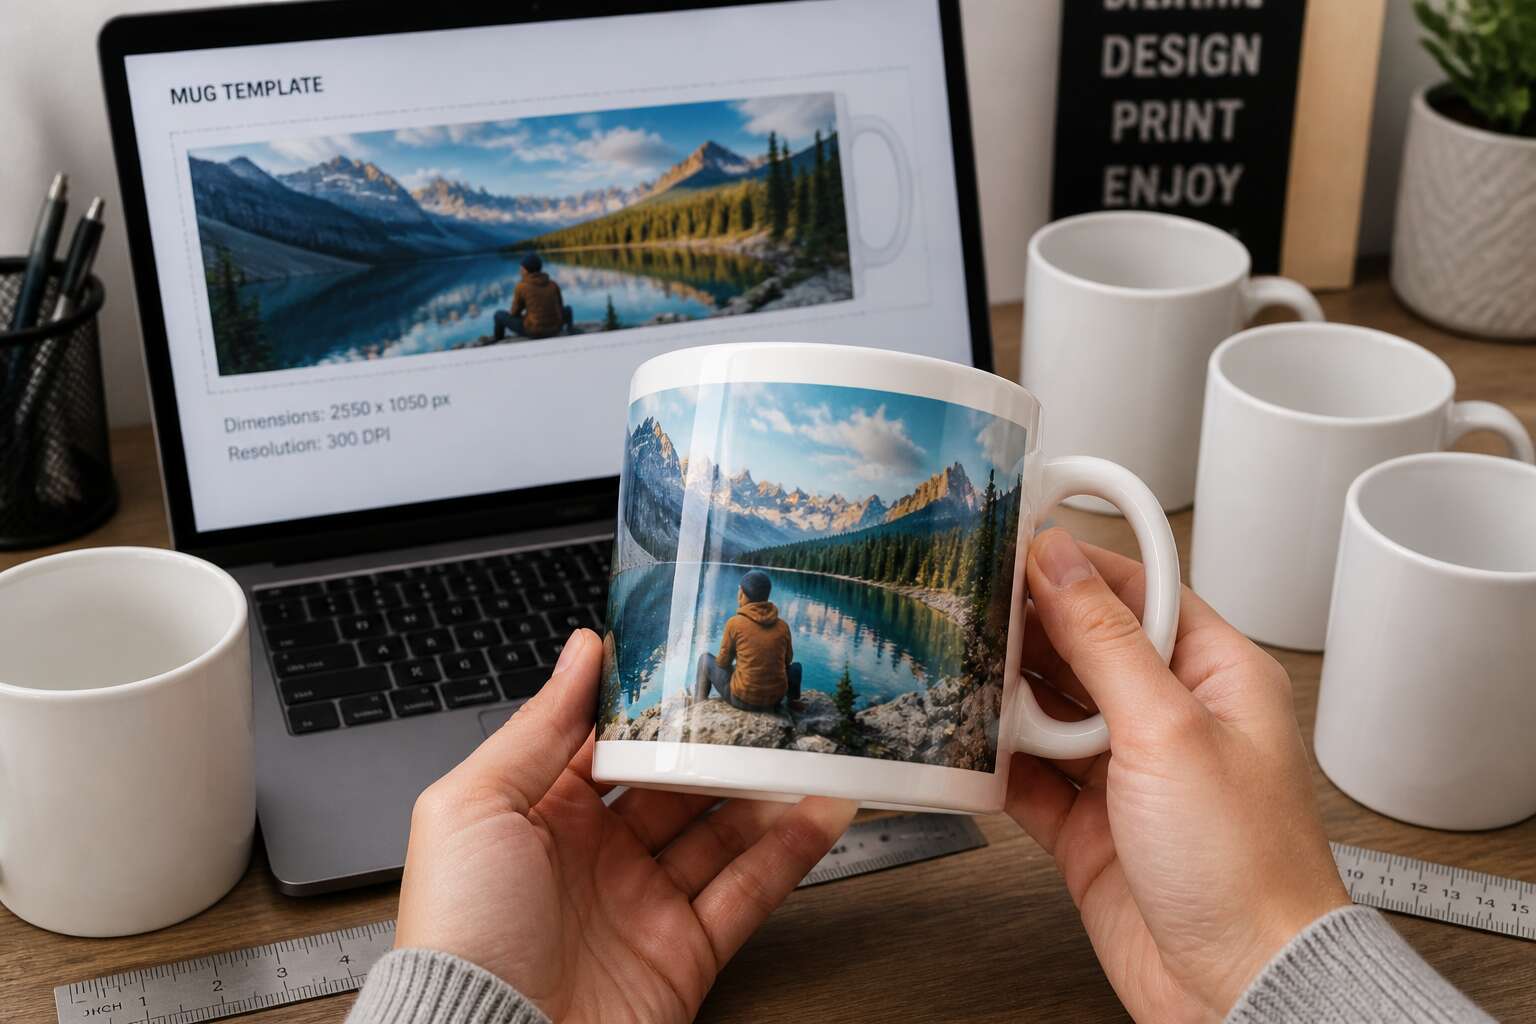
Understanding Mug Print Areas
Standard Mug Sizes and Their Circumference
Most standard mugs carry a print area that stops well short of the rim and base. The classic 11 ounce mug has a circumference of roughly 26 to 28 centimeters, which translates to a usable wrap of 22 centimeters once you account for the handle and seams. A taller 15 ounce mug stretches that circumference to about 30 centimeters!
These measurements determine what size image for mug printing will fit the curved surface without distortion. For a practical reference:
- 8 ounce mug: 20 cm circumference
- 11 ounce mug: 26 to 28 cm circumference
- 15 ounce mug: 30 cm circumference
The curvature also shifts the visible edges, so artwork must respect the flat front zone.
The Unwrapped Design Space
The space you can actually print on is smaller than you think. Understanding the unwrapped design space means working with a flattened template, not the physical mug. This flat zone dictates how your artwork bends around the curve. Ignore it and your design will warp at the edges. Here is the reality: the usable area is a rectangle, not a cylinder.
What size image for mug printing depends entirely on this flattened template. If you design for the total circumference, the handle and seams will swallow your edges. Instead, focus on the specific width and height of the print area. Most suppliers provide these exact dimensions, and they vary by mug weight.
– 8 ounce mug: roughly 8 by 18 centimeters
– 11 ounce mug: roughly 8 by 20 centimeters
– 15 ounce mug: roughly 8 by 22 centimeters
These numbers are your safety zone. They represent the sweet spot where the curve is minimal and distortion is low. Venturing past these edges pushes your image into the extreme curvature, where colors shift and text becomes unreadable. A smart designer keeps critical elements, like logos and faces, within this core rectangle.
The real takeaway is precision. The blank canvas is not the mug itself. It is the measured space between the rim, base, and handle. Working within these boundaries guarantees a crisp, professional finish every time.
Critical Print Boundaries and Curved Edges
They say the human eye can detect a one-millimetre shift in a straight line from three metres away. That judgement becomes far harsher when a logo on a mug is at arm’s length. The real challenge occurs where the flat design meets the cylindrical body, and this junction is where most printing disasters happen. Getting the what size image for mug printing question right means understanding that this boundary is not a suggestion, it is a hard constraint.
The curved edges of a mug are deceptive. They appear to be simple, gentle slopes, but they actually create a fierce focal distortion. As your eye travels from the centre of the design toward the edge, the printed graphics accelerate away from you. This effect stretches text and makes faces look wider. It is a physical property of the substrate, not a flaw in your software. The safest positioning for a logo is squarely in the middle of the print area, where the surface radius is least aggressive.
When you prepare a file, respect the boundary as you would a physical frame. Critical elements must live within a specific safe zone that mirrors the flattest part of the mug. You have a few strategic options to ensure fidelity:
1. Keep the primary text and logo within the central 65% of the width.
2. Use the outer 15% on each side only for background colours or patterns.
3. Never place a barcode or a fine font within two centimetres of the seam.
Pushing a design into the far edges guarantees a smeared, bloated appearance. For a 15-ounce coffee mug, the effective visual width is actually narrower than the physical measurement. A sturdy enamel mug might feel robust in the hand, but its thicker walls create a sharper angle for the transfer paper to wrap around. The result is a more aggressive curve, so the critical boundary shrinks even further. Always ask your supplier for the exact printable width for the specific mug type you have chosen, as it changes with every wall thickness.
Why a Flattened Template Matters
A flattened template is the only honest version of your mug design. In the hand, the mug is a curved surface. On screen, your software shows an idealised plane. The template sits between both, revealing what the press will capture.
Without a template, designers force a rectangular image onto a cylinder and hope the edges behave. The question of what size image for mug printing is answered by this file, not by guesswork. It maps the seam, the bleed, and the safe zone in one view.
Typical template layers include:
- Full bleed area, extending past the visible edge.
- Safe zone, where text and logos remain.
- Seam marker, where the wrap ends.
In my experience, a generic template from a different mug model is worse than none. It lies about what size image for mug printing will fit, and the lie shows up at the seam.
Image Resolution and Pixel Dimensions
Optimal Pixels Per Inch for Sharp Prints
A pixel is a tiny square of color, yet its density makes or breaks a mug print. For sharp results, the optimal pixels per inch, or PPI, sits at 300 for close inspection, though 200 works when the mug rests on a desk. At 300 PPI, a typical 8.8 by 3.9 inch wrap requires roughly 2640 by 1170 pixels of source imagery.
Your original image must actually carry those pixel dimensions. Many creators export a 72 PPI screenshot and then wonder why the logo blurs. The pixel count, not file size, determines sharpness. Scaling a 1500 by 1000 pixel picture to fill the wrap will soften every edge.
- Check the width and height of your source file first.
- Multiply the print area by your chosen PPI to verify.
When you evaluate what size image for mug printing, the answer hinges on this pixel math. A 12 megapixel phone photo often delivers enough data, provided you crop it to the mug’s flattened proportions.
Minimum vs Recommended File Dimensions
This is where file dimensions settle the debate. A minimum safe size for a standard mug wrap sits at 1500 by 600 pixels. That works for a quick print. The recommended size, however, is 3000 by 1200 pixels or larger. This gives the printer headroom to sharpen and colour correct without losing detail.
Consider what happens with a low resolution file. The printer stretches the pixels across the ceramic surface. Soft edges appear. Text looks fuzzy. A recommended file keeps everything crisp.
For what size image for mug printing, the file dimensions matter as much as the design. A tight crop on a laptop screen can look perfect, then fail on the mug. Check your file’s dimensions before uploading.
The following file specifications guide most South African print shops:
- Minimum: 1500 by 600 pixels
- Recommended: 3000 by 1200 pixels
- Overkill: 6000 by 2400 pixels
These numbers assume a standard wrap area. Larger mugs need larger files. Always match the file to the physical print area.
Calculating Aspect Ratio for a Full Wrap
Every full wrap print begins with a calculation. The aspect ratio is a simple division. Measure the full printable width, including the seam allowance, then divide by the wrap height. For a standard wrap area of 8.75 by 2.4 inches, the ratio lands near 3.65 to 1.
- Determine the true wrap width from the template.
- Measure the height from below the rim to above the base.
- Divide width by height.
- Apply that ratio to your pixel canvas.
For what size image for mug printing, the ratio tells you the shape before it tells you the resolution. A 3000 by 1200 pixel file holds a 2.5 to 1 ratio. A wider mug with a 4 to 1 ratio needs more width in pixels to keep the same sharpness. I have seen files that were perfect in every pixel, yet the final mug showed a misaligned seam. The ratio was the culprit.
Using DPI to Estimate Final Print Quality
The quiet arithmetic of print quality begins with DPI. Dots per inch is how your printer maps digital pixels onto physical ceramic. To estimate final sharpness, multiply the printable width by your target DPI. A mug with an 8.75 inch wrap demands about 2,625 pixels of width at 300 DPI. At 200 DPI, that number drops to 1,750. Both will print, but the higher figure preserves fine gradients and small text. This is what size image for mug printing means when you hold the finished product in your hands.
I have watched designers fall in love with a file on screen, only to see the same image soften on the mug because too few pixels were packed into the physical surface area. The resolution said one thing. The DPI told the truth.
How Scale Affects Image Sharpness
Resolution on a screen is an illusion of convenience. A 900 pixel wide image looks immaculate on a monitor, but the same data disperses when mapped across a mug’s full circumference. What size image for mug printing ultimately depends on how that finite pixel count survives physical enlargement. Every sample stretches to cover more ceramic, and edges soften first.
Scale compresses information in both directions. Shrink a design too far, and fine lines collapse into single pixels. Expand it too much, and those pixels become visibly porous. I have printed an identical photographic file onto two differently sized vessels and watched one hold detail while the other surrendered completely.
Design Layout and Safe Zones
Extending Artwork Beyond the Bleed Area
Nearly 70% of printed mugs end up with a crooked design because the artwork was placed too close to the edge. When you ask what size image for mug printing, the answer involves more than pixels. It requires respecting the bleed area and the safe zone. The bleed area extends your background beyond the final cut line, preventing white slivers. The safe zone is the inner rectangle where critical text and logos must stay. Keep these elements inside that zone:
- Your main call to action
- Your company logo
- Contact details
Without proper safe zones, your design risks being sliced off or hidden under the handle. Extending artwork beyond the bleed area gives the printer room to trim accurately. This is a simple process: expand your canvas to the template’s bleed lines, then nudge your background to cover the extra space. By doing this, you ensure that what you see on screen matches the final mug. Understanding what size image for mug printing is about mastering these boundaries, not just resolution.
Keeping Text Within the Safe Zone
Ask what size image for mug printing and you will hear about pixels, but the safe zone determines whether your words survive the process. Text placed too close to the edge gets swallowed by the wrap or hidden beneath the handle. I always check my layout against the safe zone before exporting. It takes seconds and saves a full reprint.
The safe zone is your insurance policy. It guarantees the headline stays visible and the phone number remains legible. So when you calculate what size image for mug printing, build your canvas for the bleed, then step your text back into the safe zone. That simple act keeps your design whole.
Accounting for the Handle and Seam
In polite South African company, we do not discuss the handle and the seam, yet these two features decide whether your mug design looks accomplished or apologetic. The handle claims a vertical strip of your print area, and the seam leaves a faint ridge across the ceramic. Both should determine what size image for mug printing you request, because the safe zone shifts on the handle side.
Conduct a quick wrap audit before you export:
- The handle blocks artwork on one edge, so place the focal content opposite it.
- The seam can interrupt gradients or split thin lines, so rotate the design slightly.
- A full bleed image needs extra canvas on both ends to join cleanly at the seam.
Most damaged layouts fail because the designer treated the mug as a flat rectangle. When clients ask what size image for mug printing will prevent these failures, measure the full circumference and position elements with the handle in mind. The seam rewards a skeptical eye, and the safe zone protects whatever survives the wrap.
Handling Curved Surface Distortion
Curved surface distortion is the problem many mug designs overlook. When you wrap a flat image around a cylinder, the center stretches visually and the edges compress. Your focal point must sit at the front, and straight lines will bow unless you correct them. The safe zone on a mug is a curved band where the middle shows the least distortion.
Before you ask what size image for mug printing will fix this, remember that resolution cannot undo geometry. Keep text inside the middle 60 percent of the design space, because the edges recede.
- Place critical artwork in the center third.
- Extend backgrounds to the bleed line.
- Check horizontal lines at the top and bottom, they bend most.
When you ask what size image for mug printing, the answer must include room for distortion. A taller image lets you crop away distorted bands. Respect the curve, and the safe zone protects the layout.
Mirror and Rotation Settings for Sublimation
Design layout for sublimation demands more than placing art on a template. The safe zone defines where the eye rests, but the mirror and rotation settings determine whether that art survives contact with heat and pressure. I often see files ruined because the mirror option was left off, turning text into a backward puzzle.
Rotation settings tie directly to your press orientation. A vertical mug press requires a rotated image, while a clamshell press may not. When you ask what size image for mug printing, the answer also depends on how the layout aligns with the mug’s seam.
- Mirror horizontally before printing.
- Rotate 90 degrees if the press loads vertically.
Test these settings with a paper wrap first. The safe zone stays consistent, but the geometry shifts. Your layout must accommodate the transfer direction, not just the pixel dimensions.
File Formats and Color Profiles
Best File Types for Mug Printing
The conversation about resolution and templates often pauses at the file itself, where the digital blueprint meets the physical process. This is where the nuances of file formats and colour profiles decide between a vivid, enduring design and a faded, brittle disappointment. For sublimation, the format you choose must preserve the fine gradients and crisp lines of your artwork without introducing compression artifacts. A high-quality PNG or TIFF file retains all the necessary data, ensuring that every subtle tone of your design is translated into the print, whereas a heavily compressed JPG might introduce blocky distortions visible in the final product.
Equally important is the colour profile, which quietly governs the vibrancy of the final cup. Most commercial sublimation printers in South Africa are calibrated for the sRGB or Adobe RGB colour space, which means designing in the correct profile from the start prevents a nasty surprise where your printed colours appear muted or shifted. It seems paradoxical, but the screen representation is rarely the final truth; the ink and the polymer coating have their own language of colour. When you are checking what size image for mug printing, always verify that the file is saved in the right RGB profile, as this ensures the printer interprets your hues accurately.
Yet, the format of the file also dictates how flexible you can be with the final output.
– TIFF files are preferred for their lossless compression, making them ideal for retaining maximum detail during the sublimation transfer.
– PNG files offer a balance of clarity and smaller file size, working well when your design includes transparent elements.
– Vector formats like SVG or AI are excellent for text and logos, though they must be converted to a raster format before printing, since the printer works with pixels, not paths.
Choosing between these formats often depends on the complexity of your artwork and the software you use. For a detailed photographic wrap, a TIFF is your best ally. For a sharp, icon-focused mug, a high-resolution PNG is sufficient. The ultimate goal is to preserve the integrity of your design so that the final product on the mug matches the creative vision you had on screen, without any loss of quality in the physical transfer.
RGB vs CMYK for Dye-Sublimation
One silent killer of vibrant sublimation is the colour space. Many South African designers export in CMYK because conventional printing demands it. That is a mistake for dye sublimation. Your monitor and your sublimation printer both speak RGB, a colour language built from light. CMYK is subtractive, built from ink, and its gamut is narrower.
RGB offers a wider spectrum, especially in bright oranges and deep cyans. Those hues are the lifeblood of a bold mug design. When you ask what size image for mug printing, the question is often about dimensions, but the colour profile holds equal weight.
Sublimation printers convert RGB data into CMYK ink lays during the print job. Sending a CMYK file means a double conversion, and every conversion loses fidelity. You lose the saturation that makes your design pop off the ceramic.
A practical approach:
– Design in RGB from the start.
– Save your final file as RGB.
– Let your driver handle the CMYK translation.
Check your software’s export settings. If you have been saving in CMYK, switch. Your print will show it. The colour shift is often subtle, but it is the difference between a generic print and one that looks unmistakably premium. Get the size right, but get the colour space right too. Your customers will notice.
Using Transparent Backgrounds Correctly
Most mugs print on white ceramic. A transparent background means the white of the mug does the work. But many designers send files where the checkerboard gets flattened into white or black. That ruins a clean design. Check your export settings before you upload.
When you ask what size image for mug printing, the file format carries the colour profile too. PNG keeps transparency. JPEG never does. If your software embeds a profile, stick with sRGB. Adobe RGB looks richer on screen but shifts when the sublimation driver interprets it. Subtle shifts become obvious on a glossy curved surface.
File formats and colour profiles only help if the background is truly transparent. Common mistakes appear at export:
- Flattening layers, which fills transparency with a solid background.
- Saving a PNG with a mismatched embedded profile.
- Adding a drop shadow that gets clipped at the wrap boundary.
A transparent PNG with sRGB embedded gives the driver clean data. Let the printer handle the rest.
Embedding Profiles for Consistent Color
An embedded colour profile tells the printer how to interpret the numbers in your file. Without it, the driver assumes a default, and that default rarely matches your screen. The result is a mug that looks washed out or overly warm. For dye sublimation on ceramic, sRGB remains the safest container. Its gamut aligns with what the coated blank can actually absorb.
People ask what size image for mug printing because sharpness is easy to measure. Colour is not. A 300 DPI file with a mismatched profile prints worse than a 150 DPI file with a correct one. The eye tolerates a soft edge more readily than it accepts a greenish grey.
Open your export dialog and look for the profile dropdown. Select sRGB IEC61966-2.1. Save the file, then reopen it to confirm the tag survived. Most export tools strip it if you choose optimised or web ready settings. A quick check prevents a full run of dull ceramics.
Tools and Template Resources
Creating a Custom Mug Template in Canva
Canva’s design space is generous, yet a mug demands precision. I often start by setting custom dimensions before anything else. The question of what size image for mug printing matters more than any filter or font choice. Without the correct parameters, your artwork may crop awkwardly or lose sharpness.
Canva offers preset templates, but building your own gives control. You select the exact pixel dimensions from the menu. Then you align your design to the visible guide. For a smoother workflow, consider these:
- Use the ruler guides to map the wrap area.
- Duplicate your design for a quick mockup.
- Export at the highest PNG quality available.
I have spent hours adjusting layers in Canva, only to realize the original file size was off. Once you lock in the correct values, every subsequent step feels easier. That initial decision, the exact image size, saves you from later frustration. Trust me, the measure matters!
Setting Up Guides in Photoshop
Photoshop rewards methodical setup. The Ruler tool locates the exact wrap area before a single pixel is placed. I use the View menu to pull guides from the rulers. For a standard 77mm tall mug, the visible print area maps to 900 by 1800 pixels at 300 PPI. The seam and handle positions determine where the wrap starts and ends.
- Drag a vertical guide to the seam line.
- Drag a second vertical guide to the handle edge.
- Drag horizontal guides for the top and bottom safe margins.
- Save the guide layout as a reusable template.
Adobe Bridge catalogs these template files alongside the final PNG exports. The question of what size image for mug printing becomes a simple check against the markers. Your file dimensions, the printed canvas, and the mug’s physical wrap all align through these reference lines. Without them, a design drifts toward the handle or wraps past the seam.
Free Mug Mockup and Template Downloads
A free mug mockup from a reputable source shows the exact pixel boundaries for a 900 by 1800 pixel canvas. Without this, guessing the print area wastes time. The what size image for mug printing question disappears when the template has built in guides.
I always look for layered PSD files. These let you toggle artwork on and off. Check if the download includes a bleed layer and a safe zone layer. That saves me hours!
- Templates matching your mug’s circumference align easier
- A resolution of at least 300 PPI prevents blur
- A simple colour block test reveals distortion
Free downloads are not all accurate. Compare the template’s pixel dimensions against your own ruler measurements.
Using Online Design Tools for Bulk Printing
Bulk printing turns the question of what size image for mug printing into a logistical test. Managing thirty variants through one interface demands a template field that works across every product. I have found that few cloud based mockup generators let you lock the safe zone for an entire batch.
For bulk orders, the interface should show live pixel dimensions as you switch between mug sizes. A tool that hides this data forces you to revisit the what size image for mug printing problem for each upload. That repetition eats profit margins!
- Upload presets that remember DPI and bleed
- Thumbnails that show curved surface distortion
- Batch resizing that keeps your aspect ratio
Test with a two tone gradient before the full run.
Common Sizing Mistakes and Troubleshooting
Upscaling Low-Resolution Images Without Fear
Most sizing failures don’t come from software. They come from assuming an image that looks crisp on a phone screen will hold up on a ceramic surface. When you ask what size image for mug printing, the honest answer begins with your source file’s pixel dimensions.
Common mistakes pile up: cropping the design too tight, relying on a 72 DPI web image, or stretching a small file because it looks okay at 50% zoom. Each choice erodes detail that sublimation ink cannot invent later.
- Upscaling a 300 x 300 pixel image to full wrap size creates soft edges.
- Enlarging a low quality JPEG introduces blocky color transitions.
- Stretching non-uniformly distorts curved text near the seam.
Troubleshooting upscaling low resolution images without fear is possible. Good interpolation software can double a file’s dimensions if the original was sharp. Keep aspect ratio locked and review the result at 100% zoom before exporting.
Misjudging Wrap Coverage Around Curvature
Most people treat a mug as a flat panel and then wonder why the artwork leans after printing. Trouble starts when wrapping coverage is misjudged around the curved body. A mug tapers, so the circumference at the top differs from the base. A design sized for the middle will gap or overlap at the edges, and the seam shows the error plainly.
Common sizing mistakes:
- Measuring the widest point and assuming it applies everywhere.
- Placing the seam opposite the handle without checking how the wrap shifts.
- Trusting a front-view screenshot to estimate full coverage.
The eye sees the front, but the print wraps around. When you ask what size image for mug printing is needed, the answer is tied to the total surface, not the visible panel. Misjudging the wrap coverage around curvature leads to stretched text and misaligned edges. Nobody wants a logo that looks distorted where the mug curves.
Overlooking White Film and Transfer Paper Settings
Common sizing mistakes rarely come from a single calculation error. Often the printable width stated by the mug manufacturer is completely ignored. Each blank has its own coated surface limits, and a design sized for one brand will bleed off another. The true test of what size image for mug printing comes from the manufacturer’s spec sheet, not from assumptions carried over from a previous project.
Troubleshooting overlooks white film and transfer paper settings in equal measure. The white film on the mug is the base that makes dye sublimation inks hold their intensity. When that layer is thin or patchy, even a perfectly dimensioned file produces muddy colours. Transfer paper settings add another silent variable. If pressure or dwell time drifts from the paper manufacturer’s spec, ink release becomes uneven and the artwork shifts.
Preventing Ghosting and Blurry Output
Measure the circumference with a flexible steel rule, not a fabric tape stretched around the outer glaze. The glaze adds thickness that changes your numbers, and every millimetre shifts the design toward the handle seam. I have seen artwork sized perfectly for the front panel arrive at the press with a 4 mm gap on one side and a bleed on the other. The common thread is always the same: the artisan relies on a borrowed template instead of asking what size image for mug printing their own blank accepts.
Ghosting appears when the transfer paper lifts and re-settles during the press cycle, leaving two faint edges of the same design. The causes are rarely exotic!
- A speck of dust under the paper
- Uneven heat tape tension
- A mug warmer than room temperature at loading
Remove them and the answer to what size image for mug printing surfaces without guesswork.




0 Comments